| для создания реалистичных коллизий камеры с уровнем,я добавил физзикс обьект,а точнее - сферу,за которой будет следовать камера.для удобства обзора я применил камеру,которую обычно называют камерой от третьего лица вот обьявление обьекта,от которого зависит камера Code
paircam = new SPhysxAndNodePair;
paircam->PhysxObject = physxManager->createSphereObject(camera->getPosition(), core::vector3df(0,0,0), 50, 100, NULL);
paircam->SceneNode = smgr->addSphereSceneNode(5, 12, 0, -1, camera->getPosition(), core::vector3df(0, 0, 0), core::vector3df(1.0f, 1.0f, 1.0f));
таким образом я добавил физзикс сферу в нашу сцену.в строке 3 обьявлено добавление видимого нода.радиус видимой сферы установлен на 5,вы можете изменить его.чтобы сферу вообще небыло видно,поставьте 0. реалистичное передвижение такой сферы я реализовал как установку векторов скоростей по нажатию клавиш w и s -соответственно,вперёд, и назад их я обьявил как отдельные функции: Code
void forward(IrrPhysx::IPhysxObject* OBJ)
{
scene::ISceneManager* sm = device->getSceneManager();
scene::ICameraSceneNode* camera = sm->getActiveCamera();
core::vector3df start = camera->getPosition();
core::vector3df end = (camera->getTarget() - start);
core::vector3df vel = (camera->getTarget() - start)/10;
vector3df objspeed ;
OBJ->getLinearVelocity(objspeed);
vel = vector3df(vel.X,objspeed.Y,vel.Z);
OBJ->setLinearVelocity(vel);
};
void backward(IrrPhysx::IPhysxObject* OBJ)
{
scene::ISceneManager* sm = device->getSceneManager();
scene::ICameraSceneNode* camera = sm->getActiveCamera();
core::vector3df start = camera->getPosition();
core::vector3df vel = (camera->getTarget() - start)/10;
vector3df objspeed;
OBJ->getLinearVelocity(objspeed);
vel = vector3df(vel.X,-objspeed.Y,vel.Z);
OBJ->setLinearVelocity(-vel);
};
как видите,подобный способ перемещения обьектов может быть применён к любому IPhysxObject обработка нажатий клавиш находится в цикле while(device->run()) и имеет вид: Code
if(keys[KEY_KEY_W]){forward(paircam->PhysxObject);}
if(keys[KEY_KEY_S]){backward(paircam->PhysxObject);}
после чего идёт Code
paircam->updateTransformation();
CameraUpdate(paircam->SceneNode);
метод CameraUpdate - это метод,который перемещает вашу АКТИВНУЮ камеру за нод сцены.код метода: Code
void CameraUpdate(ISceneNode* mesh)
{
scene::ISceneManager* sm = device->getSceneManager();
scene::ICameraSceneNode* camera = sm->getActiveCamera();
core::vector3df start = mesh->getPosition();
core::vector3df end = (camera->getTarget() - start);
end.normalize();
start -= end*100.0f;//100.of -это необходимая дистанция
camera->setPosition(start);
};
если же нужна какая-либо иная позиция,то просто модифицируйте вектор start так,как вам нужно если вы откроете сорц,то вы найдёте обработчик нажатия клавиши C вызывается shoot,а не createspherefromcamera спросите почему?обьясню.т.к. камера находится ЗА вашим обьектом,то при использовании createspherefromcamera шары будут вылетать за обьектом, и воздействовать на него.нам это не нужно.сорц метода shoot приведён ниже. SPhysxAndNodePair* shoot(IPhysxManager* physxManager, scene::ISceneManager* smgr, video::IVideoDriver* driver, scene::ICameraSceneNode* camera, f32 radius, f32 density)
{ core::vector3df start = camera->getPosition();
core::vector3df end = (camera->getTarget() - start);
core::vector3df vel = (camera->getTarget() - start)/5; end.normalize();
start += end*100.0f;//100-дистанция от камеры до обьекта
end = start + (end * 65);/.65 - дистанция от точки ПЕРЕД обьектом до центра обьекта return createSphere(physxManager, smgr, driver, end, radius, density, &vel);
}; keys[KEY_KEY_C] = false в обработчике добавлен для того,чтобы по 1 нажатию вылетал только 1 шар,но если зажать C то шары польются как из пулемёта) вродебы всё.по любым вопросам пишите комментарии тут или на форум сорц: Code
/** Example 002 Quake3Map
This Tutorial shows how to load a Quake 3 map into the engine, create a
SceneNode for optimizing the speed of rendering, and how to create a user
controlled camera.
Please note that you should know the basics of the engine before starting this
tutorial. Just take a short look at the first tutorial, if you haven't done
this yet: http://irrlicht.sourceforge.net/tut001.html
Lets start like the HelloWorld example: We include the irrlicht header files
and an additional file to be able to ask the user for a driver type using the
console.
*/
#include <irrlicht.h>
#include <iostream>
#include <IrrPhysx.h>
#include "ShapeCreation.h"
bool keys[irr::KEY_KEY_CODES_COUNT];
bool mousemove;
s32 lastTime;
class MyEventReceiver : public IEventReceiver
{
public:
virtual bool OnEvent(const SEvent& event)
{
if(event.EventType == irr::EET_KEY_INPUT_EVENT)
{
keys[event.KeyInput.Key] = event.KeyInput.PressedDown;
}
return false; }
};
/*
As already written in the HelloWorld example, in the Irrlicht Engine everything
can be found in the namespace 'irr'. To get rid of the irr:: in front of the
name of every class, we tell the compiler that we use that namespace from now
on, and we will not have to write that 'irr::'. There are 5 other sub
namespaces 'core', 'scene', 'video', 'io' and 'gui'. Unlike in the HelloWorld
example, we do not call 'using namespace' for these 5 other namespaces, because
in this way you will see what can be found in which namespace. But if you like,
you can also include the namespaces like in the previous example.
*/
using namespace irr;
using namespace IrrPhysx;
using namespace core;
using namespace scene;
using namespace video;
IPhysxManager* physxManager = NULL;
core::array<SPhysxAndNodePair*> objects;
f32 objectDensity = 50;
SPhysxAndNodePair* paircam=0;
/*
Again, to be able to use the Irrlicht.DLL file, we need to link with the
Irrlicht.lib. We could set this option in the project settings, but to make it
easy, we use a pragma comment lib:
*/
#ifdef _MSC_VER
#pragma comment(lib, "Irrlicht.lib")
#pragma comment(lib, "IrrPhysX.lib")
#pragma comment(lib, "PhysXLoader.lib")
#endif
/*
Ok, lets start. Again, we use the main() method as start, not the WinMain().
*/
IrrlichtDevice *device=0;
void CameraUpdate(ISceneNode* mesh)
{
scene::ISceneManager* sm = device->getSceneManager();
scene::ICameraSceneNode* camera = sm->getActiveCamera();
core::vector3df start = mesh->getPosition();
core::vector3df end = (camera->getTarget() - start);
end.normalize();
start -= end*100.0f;
camera->setPosition(start);
};
SPhysxAndNodePair* shoot(IPhysxManager* physxManager, scene::ISceneManager* smgr, video::IVideoDriver* driver, scene::ICameraSceneNode* camera, f32 radius, f32 density)
{
core::vector3df start = camera->getPosition();
core::vector3df end = (camera->getTarget() - start);
core::vector3df vel = (camera->getTarget() - start)/5;
end.normalize();
start += end*100.0f;
end = start + (end * 65);
return createSphere(physxManager, smgr, driver, end, radius, density, &vel);
};
void forward(IrrPhysx::IPhysxObject* OBJ)
{
scene::ISceneManager* sm = device->getSceneManager();
scene::ICameraSceneNode* camera = sm->getActiveCamera();
core::vector3df start = camera->getPosition();
core::vector3df end = (camera->getTarget() - start);
core::vector3df vel = (camera->getTarget() - start)/10;
vector3df objspeed ;
OBJ->getLinearVelocity(objspeed);
vel = vector3df(vel.X,objspeed.Y,vel.Z);
OBJ->setLinearVelocity(vel);
};
void backward(IrrPhysx::IPhysxObject* OBJ)
{
scene::ISceneManager* sm = device->getSceneManager();
scene::ICameraSceneNode* camera = sm->getActiveCamera();
core::vector3df start = camera->getPosition();
core::vector3df vel = (camera->getTarget() - start)/10;
vector3df objspeed;
OBJ->getLinearVelocity(objspeed);
vel = vector3df(vel.X,-objspeed.Y,vel.Z);
OBJ->setLinearVelocity(-vel);
};
int main()
{ MyEventReceiver rv;
/*
Like in the HelloWorld example, we create an IrrlichtDevice with
createDevice(). The difference now is that we ask the user to select
which video driver to use. The Software device might be
too slow to draw a huge Quake 3 map, but just for the fun of it, we make
this decision possible, too.
*/
// ask user for driver
video::E_DRIVER_TYPE driverType;
printf("Please select the driver you want for this example:\n"\
" (a) Direct3D 9.0c\n (b) Direct3D 8.1\n (c) OpenGL 1.5\n"\
" (d) Software Renderer\n (e) Burning's Software Renderer\n"\
" (f) NullDevice\n (otherKey) exit\n\n");
char i;
std::cin >> i;
switch(i)
{
case 'a': driverType = video::EDT_DIRECT3D9;break;
case 'b': driverType = video::EDT_DIRECT3D8;break;
case 'c': driverType = video::EDT_OPENGL; break;
case 'd': driverType = video::EDT_SOFTWARE; break;
case 'e': driverType = video::EDT_BURNINGSVIDEO;break;
case 'f': driverType = video::EDT_NULL; break;
default: return 1;
}
// create device and exit if creation failed
device =
createDevice(driverType, core::dimension2d<s32>(640, 480),24,false,false,false,&rv);
if (device == 0)
return 1; // could not create selected driver.
/*
Get a pointer to the video driver and the SceneManager so that
we do not always have to call irr::IrrlichtDevice::getVideoDriver() and
irr::IrrlichtDevice::getSceneManager().
*/
for(int x=0; x<irr::KEY_KEY_CODES_COUNT; x++) keys[x] = false;
video::IVideoDriver* driver = device->getVideoDriver();
scene::ISceneManager* smgr = device->getSceneManager();
/*
To display the Quake 3 map, we first need to load it. Quake 3 maps
are packed into .pk3 files which are nothing else than .zip files.
So we add the .pk3 file to our irr::io::IFileSystem. After it was added,
we are able to read from the files in that archive as if they are
directly stored on the disk.
*/
device->getFileSystem()->addZipFileArchive("../../media/map-20kdm2.pk3");
/*
Now we can load the mesh by calling
irr::scene::ISceneManager::getMesh(). We get a pointer returned to an
irr::scene::IAnimatedMesh. As you might know, Quake 3 maps are not
really animated, they are only a huge chunk of static geometry with
some materials attached. Hence the IAnimatedMesh consists of only one
frame, so we get the "first frame" of the "animation", which is our
quake level and create an OctTree scene node with it, using
irr::scene::ISceneManager::addOctTreeSceneNode().
The OctTree optimizes the scene a little bit, trying to draw only geometry
which is currently visible. An alternative to the OctTree would be a
irr::scene::IMeshSceneNode, which would always draw the complete
geometry of the mesh, without optimization. Try it: Use
irr::scene::ISceneManager::addMeshSceneNode() instead of
addOctTreeSceneNode() and compare the primitives drawn by the video
driver. (There is a irr::video::IVideoDriver::getPrimitiveCountDrawn()
method in the irr::video::IVideoDriver class). Note that this
optimization with the OctTree is only useful when drawing huge meshes
consisting of lots of geometry.
*/
SSceneDesc sceneDesc;
physxManager = createPhysxManager(device, sceneDesc);
scene::IMesh* mesh = smgr->getMesh("20kdm2.bsp")->getMesh(0);
scene::ISceneNode* node = 0;
SPhysxAndNodePair* pair = new SPhysxAndNodePair;
core::vector3df pos(0,0,0);
core::vector3df rot(0,0,0);
core::vector3df scale(1,1,1);
for (u32 i = 0 ; i < mesh->getMeshBufferCount() ; i++) {
IPhysxMesh* physxMesh = physxManager->createTriangleMesh(mesh->getMeshBuffer(i), scale);
pair->PhysxObject = physxManager->createTriangleMeshObject(physxMesh, scale,rot);
}
pair->SceneNode = smgr->addMeshSceneNode(mesh, NULL, -1, pos, rot, scale);
pair->SceneNode->setMaterialFlag(video::EMF_NORMALIZE_NORMALS, true);
physxManager->setDebugDataVisible(true);//чтобы убрать полоски,поставьте здесь false
objects.push_back(pair);
physxManager->setGravity(vector3df(0,-200,0));
//if (mesh)
//node = smgr->addOctTreeSceneNode(mesh, 0, -1, 1024);
// node = smgr->addMeshSceneNode(mesh->getMesh(0));
/*
Because the level was not modelled around the origin (0,0,0), we
translate the whole level a little bit. This is done on
irr::scene::ISceneNode level using the methods
irr::scene::ISceneNode::setPosition() (in this case),
irr::scene::ISceneNode::setRotation(), and
irr::scene::ISceneNode::setScale().
*/
//if (node)
//node->setPosition(core::vector3df(-1300,-144,-1249));
/*
Now we only need a camera to look at the Quake 3 map.
We want to create a user controlled camera. There are some
cameras available in the Irrlicht engine. For example the
MayaCamera which can be controlled like the camera in Maya:
Rotate with left mouse button pressed, Zoom with both buttons pressed,
translate with right mouse button pressed. This could be created with
irr::scene::ISceneManager::addCameraSceneNodeMaya(). But for this
example, we want to create a camera which behaves like the ones in
first person shooter games (FPS) and hence use
irr::scene::ISceneManager::addCameraSceneNodeFPS().
*/
scene::ICameraSceneNode* camera = smgr->addCameraSceneNodeFPS();
camera->setPosition(core::vector3df(1300,144,1249));
camera->setInputReceiverEnabled(true);
paircam = new SPhysxAndNodePair;
paircam->PhysxObject = physxManager->createSphereObject(camera->getPosition(), core::vector3df(0,0,0), 50, 100, NULL);
paircam->SceneNode = smgr->addSphereSceneNode(5, 12, 0, -1, camera->getPosition(), core::vector3df(0, 0, 0), core::vector3df(1.0f, 1.0f, 1.0f));
/*
The mouse cursor needs not be visible, so we hide it via the
irr::IrrlichtDevice::ICursorControl.
*/
device->getCursorControl()->setVisible(false);
camera->setFarValue(10000);
/*
We have done everything, so lets draw it. We also write the current
frames per second and the primitives drawn into the caption of the
window. The test for irr::IrrlichtDevice::isWindowActive() is optional,
but prevents the engine to grab the mouse cursor after task switching
when other programs are active. The call to
irr::IrrlichtDevice::yield() will avoid the busy loop to eat up all CPU
cycles when the window is not active.
*/
int lastFPS = -1;
lastTime = device->getTimer()->getTime();
while(device->run())
{
if(keys[KEY_KEY_C]){objects.push_back(shoot(physxManager, smgr, driver, camera, 10, objectDensity*100));keys[KEY_KEY_C] = false ;}
if(keys[KEY_KEY_W]){forward(paircam->PhysxObject);}
if(keys[KEY_KEY_S]){backward(paircam->PhysxObject);}
paircam->updateTransformation();
CameraUpdate(paircam->SceneNode);
s32 timeNow = device->getTimer()->getTime();
s32 elapsedTime = timeNow - lastTime;
lastTime = timeNow;
// Set the physics simulation going
physxManager->simulate(elapsedTime/1000.0f);
// Whilst we're waiting we can do some non-physics related work
// you must NEVER add/move physics objects whilst the simulation
// is being done though, doing so will cause all kinds of horrible crashes!
core::stringw strw;
strw = "FPS: ";
strw += driver->getFPS();
strw = "Num Objects: ";
strw += physxManager->getNumPhysxObjects();
// Wait for the physics simulation to finish
physxManager->fetchResults();
// Update our objects to the correct transformations
for (u32 i = 0 ; i < objects.size() ; i++)
objects[i]->updateTransformation();
driver->beginScene(true, true, video::SColor(255,200,200,200));
smgr->drawAll();
physxManager->renderDebugData(video::SColor(0,0,255,255));
driver->endScene();
int fps = driver->getFPS();
if (lastFPS != fps)
{
core::stringw str = L"Irrlicht Engine - Quake 3 Map example [";
str += driver->getName();
str += "] FPS:";
str += fps;
str += " rotX ";
str += camera->getRotation().Y;
device->setWindowCaption(str.c_str());
lastFPS = fps;
}
}
/*
In the end, delete the Irrlicht device.
*/
removePhysxManager(physxManager);
physxManager = 0;
device->drop();
return 0;
}
/*
That's it. Compile and play around with the program.
**/
билд-лог Code
1>------ Перестроение всех файлов начато: проект: 02.Quake3Map, Конфигурация: Release Win32 ------
1>Удаление промежуточных и выходных файлов проекта "02.Quake3Map", конфигурации "Release|Win32"
1>Компиляция...
1>ShapeCreation.cpp
1>main.cpp
1>CGridSceneNode.cpp
1>Создание кода...
1>Компоновка...
1>IrrPhysX.lib(IrrPhysx.obj) : найден .netmodule MSIL или модуль, откомпилированный с параметром /GL; перезапускается компоновка с параметром /LTCG; добавьте /LTCG в командную строку компоновки для повышения производительности компоновщика
1>Создание кода
1>Создание кода завершено
1>Внедрение манифеста...
1>Журнал построения был сохранен в "file://h:\site articles\irrlicht-1.5\examples\02.Quake3Map\Release\BuildLog.htm"
1>02.Quake3Map - ошибок 0, предупреждений 0
========== Перестроение всех: успешно: 1, с ошибками: 0, пропущено: 0 ==========
ссылка на скачку сорца - http://irrphysx.at.ua/load/iskhodniki_dlja_stati_3/7-1-0-5 ссылка на архив построенного проэкта - http://irrphysx.at.ua/load/kompilirovannyj_proehkt_stati_3/7-1-0-6 вот что у меня получилось(и наверняка получится у вас)в итоге: 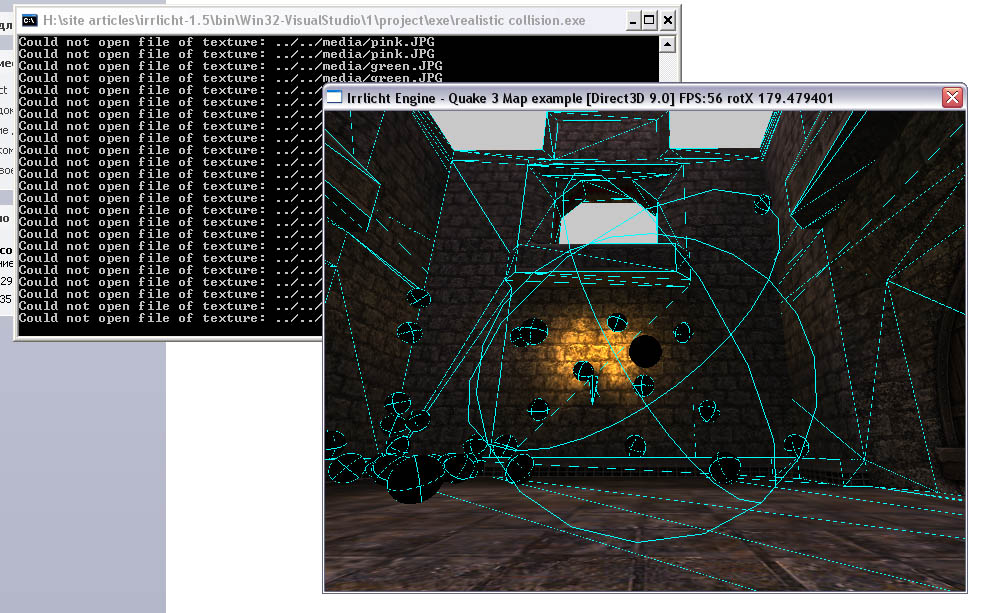
|


